


Recently a new video called “Dataflow with Autodesk Revit” was released. This covers how to transfer data between Autodesk Revit and Leica Captivate using a Leica Building Link…
Richard Ostridge, senior applications engineer at Leica Geosystems, answers questions about the process…
Richard, can you explain why a video on the dataflow between Leica Captivate and Autodesk Revit has been created?
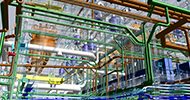
Of course. It really is us answering a demand. From customer visits, staff training, and support cases we have seen a noticeable increase in the frequency of Leica Captivate users asking about an Autodesk Revit dataflow. It seems that the increase in the adoption of BIM and the popularity of Autodesk Revit has resulted in it becoming more common for our users to be given design data that was in Autodesk Revit and for users to be asked to provide survey data ready to be imported back into Revit.
We have a great tool that is free to download and install, sits inside Revit, and helps to provide a conversion process that makes it easy to pass data between Revit and Captivate, in both directions. This video is a way for us to answer the demand for information and make users aware of the tool we have available.
Richard, you said there is a free to download and install tool. What is it called?
The tool is called Leica Building Link and is available to download from our myWorld site. Once logged in you just need to navigate to the downloads section of a Captivate product, such as the CS20…

In the tools section, you will find the version of Leica Building Link that matches the Revit software that you own…
![]()
Once you have downloaded it, run the installer to have a Leica ribbon added to the Revit which contains the Leica Building Link commands
![]()
You said that with the plugin installed it is easy to pass data between Revit and Captivate. Can you explain what makes it so easy?
Certainly. It all comes down to data formats and the added functionality that Leica Building Link brings to Revit.
The data formats used in the process are DXF (which is supported by both Captivate and Revit) and Hexagon’s XML format, HeXML (which is supported by both Captivate and Leica Building Link). As well as giving Revit the ability to import and export HeXML data, Leica Building Link also adds useful functionality for creating points (or nodes) in a Revitt model and the families that it contains.
With these formats and the functionality available to use in Revit, we can then utilise quick and easy processes for taking data both from Revit to Captivate and from Captivate back into Revit.
The “from Revit to Captivate” process starts in Revit where we use Leica Building Link to help us create control and the design data for use onsite and to export this data to a HeXML file. We then use Revit’s own export options to create a DXF file of our model and transfer both files to our instrument. Inside Captivate it is simply a matter of attaching the DXF model and importing the HeXML file into a job. We can then see the data in the 3D viewer and use it in our onboard apps.
The “from Captivate to Revit” process is just as easy, with our site work done, we export a HeXML file from our job, transfer this file to our computer and using Leica Building Link bring the HeXML file back into our model – allowing us to update and extend our Revit model with real world data.
I have done my best to explain it in words, but the best way to understand this process is to watch the how-to video and try it out.

Richard Ostridge, senior applications enginner at Leica Geosystems