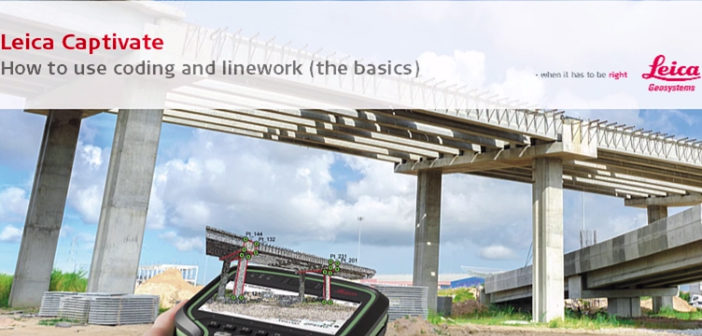
In this week’s Leica Captivate Education series post, Bettina Dense, initiator of the Captivate Education series, talks to Gorka Santamaria, Application Engineer at Leica Geosystems on the Leica Captivate coding and lining feature.
Enjoy!
First of all, what does “coding & linework” stand for?
It is the generic term we use to refer to the process of measuring point or linear features in the field, such as trees or fences, and then represent them in a map or drawing. Until now, a field surveyor would simply store a code or description alongside every measured point. Once the surveying task was done in the field, it would be recreated in the office, for example, with a CAD operator joining points coded as fence to represent the fence itself. More advanced field users would store additional commands or attributes to facilitate the office work, allowing the codes to be automatically processed by common rules within the CAD software and therefore automating the drawing process.
So what is new in Leica Captivate about coding & linework?
We could say that coding in Leica Captivate is not a blind task. The new field coding user interface does not require the field surveyor to learn any complex sequence of commands, only to add the information concerning the point or linear feature about to be measured to the code box, measure it and see the map or 3D Viewer update in real time. This way of graphically assisted coding is explained quite nicely in Leica Captivate’s coding & linework how-to video.
Previous interviews (Click here for Alastair Green’s field SW interview) discuss the importance of the user experience when designing Leica Captivate. Which role did it play when designing the Captivate field coding interface?
A very crucial one and we are really happy about all the positive feedback we receive on how easy and intuitive coding actually is in Leica Captivate. But there is more to it than that. Personally what I find most gratifying, is when a customer embraces our vision of the user experience as much more than a “nice-to-have” and actually realises the huge benefits in terms of efficiency.
In our industry, we occasionally fall into the trap of measuring productivity only by how many keys were pressed to perform a repetitive task. This is of course important, but efficiency is also about just how smartly those buttons were pressed, about minimising human error and about being able to deal with the daily obstacles that appear on the work site.
Could you give some examples of these obstacles and how to overcome them using Leica Captivate?
Of course. Let’s imagine some of the three most common setbacks while doing coding & linework tasks: measuring a wrong point by mistake, losing track of the line being surveyed and being unable to complete it due to lack of visibility.
a) Measuring a wrong point:
Let’s imagine we are surveying a linear feature. If we measure a wrong point, one of the benefits of the integrated map view is that we can visually identify the mistake in real time, so we can simply delete the point from the map. The line is immediately updated and the code box will also acknowledge the change. For example, if the wrong point was the 3rd point of an arc and we delete it, the arc disappears, but the next point of that line we measure will re-draw the arc again. This applies to other complex geometries such as splines or best fit arcs.
See slide show #1
If we were unlucky enough to only discover the mistake after surveying the whole line, it is also possible to edit the line from the map and modify its geometry by adding or removing a node – that is, a point plus its associated geometry.
b) Losing track of the line being surveyed:
Here’s another example: If we were measuring several linear features of the same code while performing a cross-section survey of a road, and while doing this, forgot the number of the line to be updated, we could simply tap on the line in the map and select the option “Continue linework” to automatically fill in the code box with the information about the selected linear feature, which can then be measured with a new point.
See slide show #2
c) Unable to complete a line due to lack of visibility:
This is also a common situation: to start measuring a linear feature in a given direction, only to realise that we cannot proceed to the next setup due to lack of visibility, however we could continue measuring in the opposite direction. It’s easy to rectify this by tapping on the line in the map and selecting the option “Reverse line”. Any new point measured will be added to the line in the opposite direction, as indicated by the arrows. Once the new setup has be completed, we can reverse the direction again, back to as it was originally, and continue measuring the line.
See slide show #3
It seems that all roads lead to the map. Is there any additional recommendation on the map usage?
One of my favourite tips is to use the Center to Target option when using a robotic instrument or a GNSS sensor, either in 2D or 3D map view. In cases where the target is continuously tracked, this option allows the map to always be centred on your position, so there is no need to drag the map to the current location after every measurement to see what was actually measured. This is particularly helpful when measuring lines.
See slide show #4
You mentioned the key presses before, but when I see you interact with the software, you generally use the touch screen…
I guess I have already been won over by touch technology… however, when using a Leica CS20, it is still possible to use the keyboard and still retain all the functionality. Leica Captivate was designed so that either the touchscreen or keyboard or a combination of both can be used. For example, interacting with the 3D Viewer is easier via touchscreen, but storing repetitive points is often faster by pressing a key. When coding, it is also possible to manage the code boxes using the function key “Define”, which enables a second set of keys to change the code, its role in the line, its attributes or the string number, if it is a linear feature – hence updating the information within the code box.
In fact, out of these functions, we realised typical keypad users simply needed to change the code and the line number most of the times, so we added shortcuts by pressing Enter and Left/Right to do this faster.
See slide show #5
What can you say about measuring multiple codes?
This was really one of the top wishes we had: How to handle all those fence-gate-fence or bottom of slope-top of slope junction cases. In fact, it is possible to tick up to 10 code boxes and measure all of them at once, which potentially means up to 10 points, each with its own attribute set, up to 10 lines… all measured in a single shot and properly updated in the map as well. And then… back to normal, because multi-coding is only active while the measurement is being performed.
Is it mandatory to create a codelist beforehand?
No, it is not. Of course, using a codelist is highly recommended, especially to meet a certain layer structure when producing the topographic map, to manage attributes with predefined values or choice lists, or to have a company standard, which is common for all the different field crews.
When using a codelist, there are also two possible scenarios: letting it be updated by the field surveyor or keeping it locked. There is a setting called “Allow new codes to be created” that helps in making this decision. If ticked, the user can input any new code manually in the find & add codes field and the new code will be added to the codelist as soon as it is measured. If unticked, the find & add codes field does not allow any code that does not belong to the codelist, hence protecting its original state. It can be protected even more if admin settings are applied…
See slide show #6
Finally, there is a second how-to video second how-to video focusing on cross-section surveying. Is there any tip you would mention about this particular method?
Well, this is in fact, one of my favourite functionalities.
It does little more than changing the behaviour of the code box list. Instead of always selecting the last used code on top of the list, the list remains fixed and the selection moves along it in one or both directions, which is especially useful when surveying cross-sections, such as a road and its side slopes.
Additionally, when the Pause function is activated, the selection also remains fixed and it is the user who manually changes it, which is my preferred way to work when toggling very often between very few codes with no specific order rule. I really believe all of this combined, along with the ability to load and save code templates, makes it a very powerful suite of options, which help to find an easy solution to most challenges while surveying features.
You can read more about Gorka Santamaria by visiting his social media accounts.


