Construction sites are harsh environments that put incredible strain on rotating lasers. These instruments are not treated with a lot of care – they get dropped, knocked down or toppled over and may also become covered in dirt and concrete. In the majority of construction projects, rotating lasers face so many impacts during regular use that their accuracy can no longer be guaranteed. Like in other precision instruments, mechanical and optical parts are vulnerable to shocks and, in the worst case, might become loose upon impacts such as hard drops or heavy vibrations. This can cause inaccuracy due to the instability of the laser beam and thus, application mistakes may occur.
Laser checking and calibration methods
 Knowing about the harsh treatment of rotating lasers, various manufacturers offer checking and calibration possibilities to end users and service providers. A simple field test performed by an end user can easily verify if a laser needs to be adjusted. The majority of rotating lasers today can also be adjusted by end users – this however requires knowledge about pressing certain button combinations and is often perceived as complicated and prone to mistakes.
ISO 17123-6 is the internationally recognised standard that describes a comprehensive procedure to verify accuracy and repeatability of rotating lasers against manufacturing specifications.
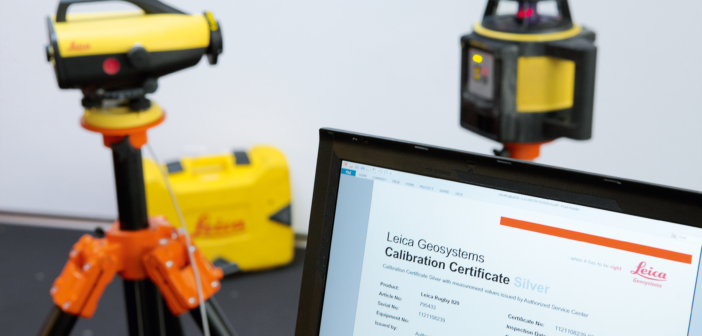
Since 2013, Leica Geosystems performs outgoing tests of rotating lasers with respect to the ISO 17123-6 procedure and delivers each Rugby 800 series laser with a Leica Geosystems Calibration Certificate Silver. This certificate for rotating lasers is also offered to laser owners and end users by the Leica Geosystems Service Centres and Service Partners around the world, who own the Leica CalMaster calibration system.
More information can be found in the video: http://leica-geosystems.com/opening_new_opportunities
What is ISO 17123-6?
According to the International Organization for Standardization, ISO 17123-6 specifies field procedures to be adopted when determining and evaluating the precision (repeatability) of rotating lasers when used in building and surveying measurements for levelling tasks. Primarily, these tests are intended to be field verifications of the suitability of a particular instrument for the immediate task at hand.
Traceability to international standards (ISO)
 The overall demand for calibration certificates confirming the measurement quality of new or used construction equipment is increasing. This is mainly due to the fact that more and more constructions companies or their contractors are becoming ISO 9001 certified and therefore need to confirm the accuracy of their equipment periodically. It is important for Leica Geosystems that instruments fulfill the highest standards.
- Calibration Certificates Blue are issued at Leica Geosystems Authorised Service Centres to confirm that the individual product was checked and that the published specifications were met.
- Calibration Certificates Bronze are based on the manufacturer’s defined procedures and confirm that the individual product was inspected and that the published specifications were met.
- Calibration Certificates Silver are based on the manufacturer’s defined standards and the test procedures are traceable to national standards or to recognised procedures.
- Calibration Certificates Gold are internationally acknowledged and the test results are directly traceable to national standards (national accreditation of the calibration laboratory).
Today, Leica Geosystems offers Blue and Silver Calibration Certificates for rotating lasers. Every Leica CalMaster produced is tested and calibrated using a Leica Geosystems total station with the Calibration Certificate Gold.
With the certification corresponding to the ISO 17123- 6 standard, construction companies and rotating laser owners can maximise their chances of winning construction tenders.
Click here to download the SO 17123-6 White Paper
Written by Anabela Ferreira Fernandes, Marketing Communications Manager at Leica Geosystems


